Friday, January 7, 2011

Clementine Cupcakes


I love anything citrus and I found this recipe for a Clementine Cupcake on Taste of Home web site. It is so delicious but I think I say that about everything I post... can't help it, I love it all. It does involve a cake mix and not that anything is wrong with that because they are equally as good, it's just that there is a stigma with using a "box" and calling it homemade. Anyway, it has a sophisticated flavor that truly lends itself to being acceptable at any gathering you may have; fancy or casual. You can't go wrong with this one.

INGREDIENTS
1 package (18-1/4 ounce) white cake mix
3/4 cup water
4 egg whites
1/2 cup clementine juice (about 5 clementines)
1/4 cup canola oil
1 teaspoon grated clementine peel
4 clementines, peeled, sectioned and membrane removed

FROSTING
1/3 cup butter, softened
3 cups confectioner's sugar
1/2 teaspoon clementine juice

GARNISH
3/4 cup Semi-Sweet Chocolate Chips
24 clementine sections

Directions

  • In a large bowl, combine the first six ingredients; beat on low speed for 30 seconds. Beat on medium for 2 minutes. Fill paper-lined muffin cups half full. Place one clementine section in the center of each; gently press down into batter. Chop remaining sections; sprinkle over batter.
  • Bake at 350 degrees for 15-20 minutes or until a toothpick inserted comes out clean.
  • Heat chocolate in a double broiler until melted. Make sure your clementines are free of any liquid because the chocolate will not adhere and it will ruin the chocolate. Dip the clementines half way into the chocolate and lay on waxed paper until set. Once cooled, put on top of cupcake. 
SIDE NOTE:
I didn't put any clementine into the center nor did I sprinkle pieces over the batter. I used the juice only and it gave it plenty of flavor. I used about a teaspoon of clementine rind in the frosting.

Bagel Open Face / Lunch Sandwich


I know this isn't usually the kind of things I post but I felt these were worthy of being featured.
This is a toasted Everything bagel with cream cheese, crispy bacon, caramelized onions, capers, tomatoes and a sprinkle of parmesan cheese. I put this under the broil for about a minute until the cheese melts just a bit. This is a meal in itself and it just bursts with flavor. You get the crunch with the bagel and the bacon, the creaminess with the cream cheese, the salty from the capers, the sweetness and smokey flavor from the onions and the refreshing, meaty taste from the tomato. I usually add avocado and season with salt and pepper but I didn't have one. It didn't matter, it was delicious just as it was.


This was a sandwich that I did for the boys lunch. After I made it I just had to take a picture of it because it was so beautiful.
I used crusty sour dough bread that is baked fresh from Trader Joes. I hollowed out the center just a bit so all the goodies would fit inside. I never use mayonnaise because of two reasons. My kids don't like it (I suppose that's because Phil and I don't) and it has to be refrigerated. I used cream cheese and that also serves as a barrier so the bread doesn't get soggy. I salt and peppered that and layered Colby cheese, roast beef and turkey. I added peperoncini's and artisan lettuce. I ended by putting a dressing on the lettuce that I made that night for dinner on our salad and that consisted of grey poupon, red wine, lemon, vinegar, garlic and shallots.
So Very Yummy!

Tuesday, January 4, 2011

Warm Chocolate Melting Cups With Creme Fraiche


Happy New Year! If you're anything like me this time of year, you are setting a few goals; cleaning out a closet or two (or in my case the garage Ugh!) and cutting back on the calorie intake. I think this one is my most challenging.

I have scoured the internet looking for delicious desserts that are a little more "figure friendly" than what I've been baking in the past and I have run across a couple of good ones. That's where this Warm Chocolate souffle comes in (although it isn't referred to a souffle, it certainly has the consistency of one). I have to admit though that the Creme Fraiche wasn't apart of the original recipe but after tasting it on it's own I felt like it needed a little "creaminess" added to it.

Now, the best part of this dessert was spending the day with my daughter Chelsea in the kitchen. She has turned out to be quite the baker (go figure) and I think she is going to do circles around me in no time.


INGREDIENTS

  • 1-1/4 cups sugar, divided
  • 1/2 cup cocoa
  • 2 tablespoons all-purpose flour
  • 1/8 teaspoon salt
  • 3/4 cup water
  • 3/4 cup plus 1 tablespoon semi-sweet chocolate chips
  • 1 tablespoon brewed coffee
  • 1 teaspoon vanilla extract
  • 2 eggs
  • 1 egg white
  • 10 fresh strawberry halves, optional
  • 1 7.5 ounce container Creme Fraiche or Cool Whip (optional)
DIRECTIONS
  • In a small saucepan, combine 3/4 cup sugar, cocoa, flour and salt. Gradually stir in water. Bring to a boil; cook and stir for 2 minutes or until thickened.  Remove from heat; stir in the chocolate chips, coffee and vanilla until smooth. Transfer to a large bowl.
  • In another bowl, beat eggs and egg white until slightly thickened. Gradually add remaining sugar, beating until thick and lemon-colored. Fold into chocolate mixture.
  • Transfer to ten 4-ounce ramekins coated with cooking spray. Place ramekins in a baking pan; add 1 inch of water to pan. Bake, uncovered, at 350 degrees for 20-25 minutes or just until centers are set.
  • Add 2-3 tablespoons of sugar to container of Creme Fraiche and stir. Dollop on top of chocolate when cooled.

    Ingredients

    Sugar, flour, salt, coco. Add water, bring to boil.

    Beat eggs, egg whites until thickened. Gradually add sugar and beat until thick and lemon colored.

    Temper the chocolate as to not "scramble" your eggs. You do this by adding a little bit of chocolate mixture at first and fold in to incorporate. Do this in batches, folding with each addition.

    Spray ramekins with cooking spray. Best to do this over the sink incase of overspray. 
    (Chelsea ended up spraying the herbs though... Oops!)

     Fill ramekins about 3/4 full and place in a baking pan.

     Heat water

    Fill baking pan with hot water half way up being careful not to get into chocolate mixture.
    This process is called a water bath. It is the dish of water that baked goods requiring gentle heat are baked in, instead of placing them directly in the oven. This is for even baking and so dishes maintain a smooth and even texture.

    SIDE NOTE
    • I used less chocolate chips because in as much as I like chocolate, I don't like it overpowering. I found it to be perfect with 1 cup only. 
    • Creme Fraiche is more like a sour cream but not as tart and more flavorful than whipped cream. The French use it as a gourmet addition to sauces and as the perfect topping for rich desserts. You can substitute regular whipped cream which is always good or for a low calorie topping use non dairy Cool Whip, that is equally as good.
    • When serving, you can pop the ramekin in the microwave for about 10 seconds and then top with whatever topping you are using. SO DELICIOUS! You will want to make this over and over again. Word to the wise... It doesn't make very much. We filled only eight ramekins about 1/2 way so you may want to double the recipe.

    Sunday, December 5, 2010

    Red Velvet Cookies From "Taste Of Home"


    This cookie is a cross between a cookie and cupcake. It has the consistency of the top of a cupcake but the size of a cookie. I took them to Luke's volleyball tournament this weekend and they were easy to transport And they tasted good so I would definitely make them again.

    Ingredients:
    1 cup shortening (I used 1/2 cup shortening and 1/2 cup butter)
    1 cup sugar
    3/4 cup packed brown sugar
    3 eggs, separated
    2 teaspoons red food coloring (If you are using paste, add 2 tsp water)
    4 cups flour
    3 tablespoons baking cocoa
    3 teaspoons baking powder
    1 teaspoon salt
    1 cup buttermilk
    2 cups (12 ounce) semi-sweet chocolate chips

    FROSTING
    1-1/2 cups butter, softened
    3-3/4 cups confectioners sugar (powdered sugar)
    1/8 teaspoon salt
    3 to 4 tablespoons milk

    Directions:

    • In a large bowl, cream the shortening and sugars until light and fluffy. Beat in egg yokes and food coloring. Combine the flour, cocoa, baking powder and salt. Add to the creamed mixture alternately with buttermilk, beating well after each addition.
    • In another bowl with clean beaters, beat egg whites until stiff peaks form; fold into batter. Fold in chocolate chips. Drop by tablespoons 2 in. apart (I used a scoop) onto greased baking sheets. Bake at 350 degrees for 12 - 14 minutes or until set. Remove to wire tacks to cool completely.
    • In a large bowl, beat butter, confectioners sugar and salt until completely blended. Add enough milk to achieve desired consistency. Frost cookies; sprinkle with decorative sugars ( I used coarse white sugar). Store in airtight container or freeze up up to 1 month. Makes about 7 dozen.


    Nutrition Facts:
    1 cookie equals 124 calories, (OUCH) 7 g fat (3 g saturated fat), 15 mg cholesterol, 71 mg soduim, 16 g carbohydrate, trace fiber, 1 g protein.

    Wednesday, December 1, 2010

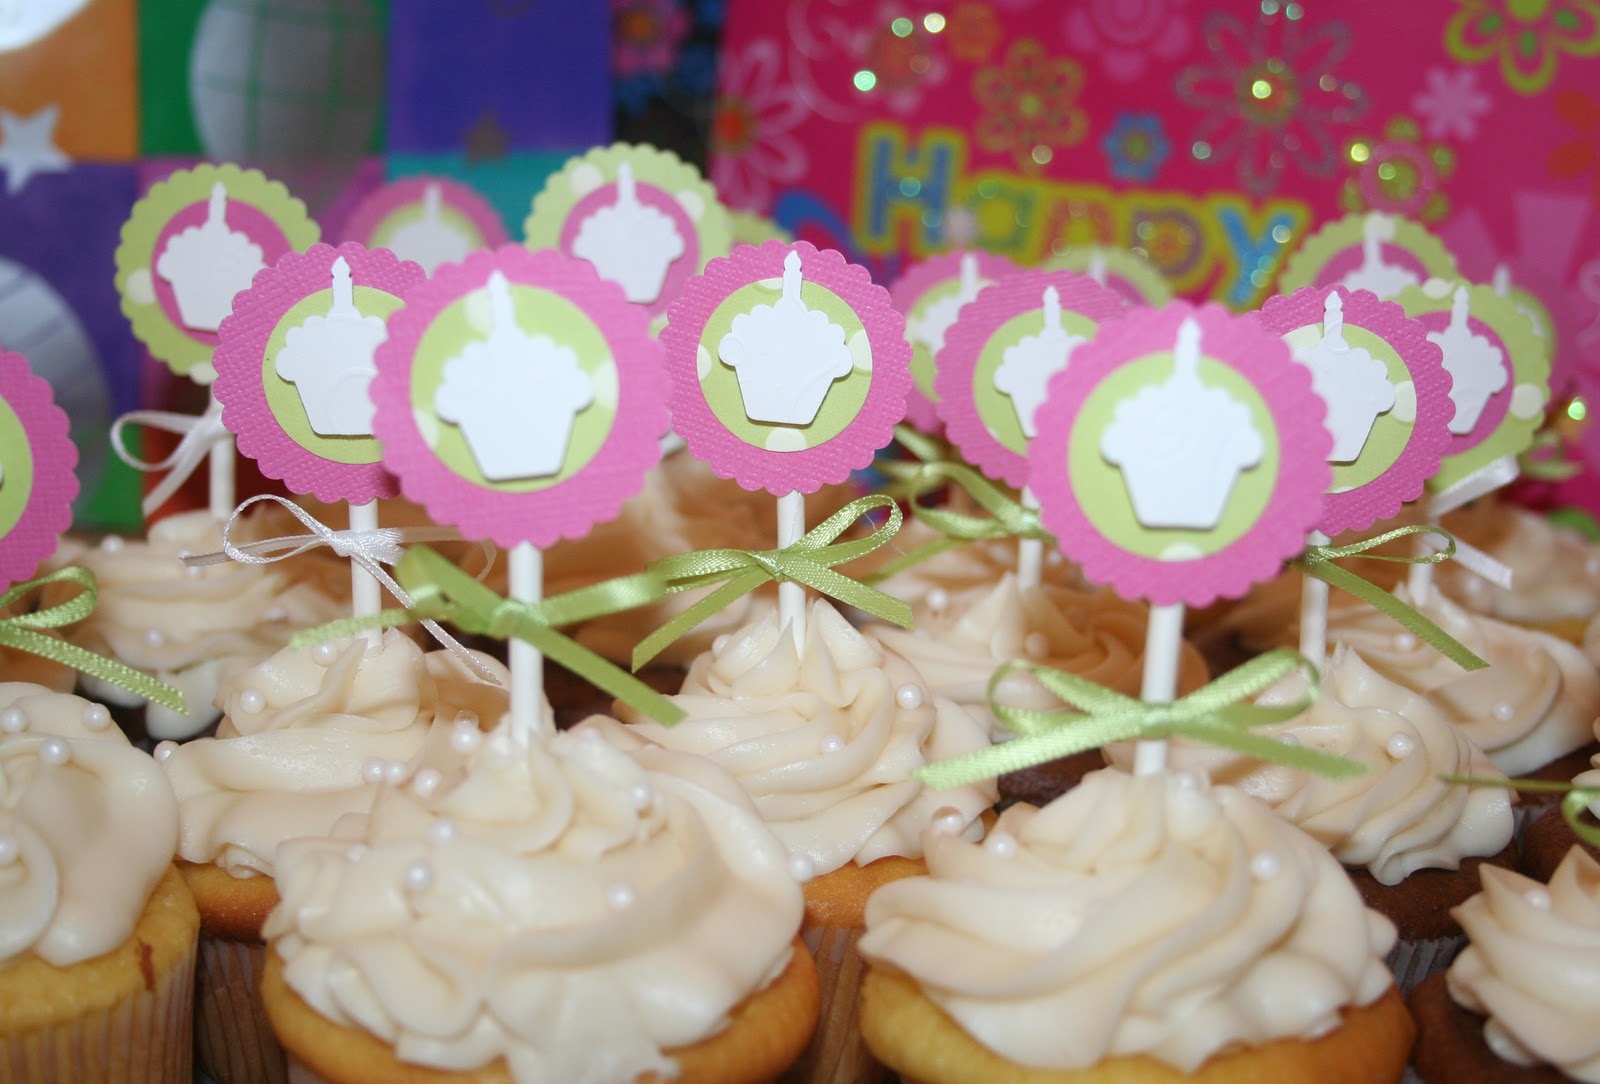
    Cupcake Paper Decorations


    Cupcake Paper Decorations


    November is a busy birthday month for our family so I was busy baking cupcakes for a big get together.
    I made paper cupcake toppers that are cut out from coordinating card stock and glued to a lollypop stick and finished with a ribbon. They turned out pretty cute. You can reuse them as long as you clean them  good.


    Thursday, August 26, 2010

    Lemon Bars


    I made lemon bars the other day and decided that I would take some to my dentist office. I plated them using only the best ones of course and saving the ones around the edge for us because they don't look as nice (but taste just the same). I arranged them with fresh mint leaves from my garden so they looked "just so" and put them in the fridge (subconsciously they taste better when they are pretty to look at). Anyway, I was running a little late so I quickly ran upstairs, brushed my teeth and ran back down, only to open the fridge and have the plate drop out, do a double flip and land upside down. If I were judging the creativity of the dive I would have given it a "10". I literally froze and was trying to grasp the reality of it. I don't use profanity but I did shout out a couple of choice words. I heard Phil in the background laughing and he said he wondered what words I would have chosen if I did curse. So, I scooped them up, rearranged the cellophane and put them back in the fridge and grabbed the ones in the tubberwear that were for us. Well, as I was sitting in the chair at the dentist office,  I had a moment of panic because I had just realized that I gave the office the ones that we're the "cast offs". They must have tasted okay because Heather, our hygienist wants to make them for this weekend. So... here you go Heather, I hope you are more careful than I was... ENJOY!


    Ingredients
    Crust:
    • 2 cups all-purpose flour
    • 1 cup powdered sugar, plus more for dusting
    • Pinch salt
    • 2 sticks butter, room temperature plus a little more for greasing
    Filling:
    • 6 large eggs (room temp)
    • 3 cups granulated sugar
    • 1 cup lemon juice, aprox 4 - 6 lemons)
    • 2 tablespoons lemon zest
    • 1 cup flour
    • 1 tablespoon powdered sugar for dusting
    Preheat oven to 350 degrees F. Lightly grease a 9 by 13 by 2 - inch pan.

    Make the crust by combining the flour, powdered sugar and salt in a large bowl. Cut in the butter to make a crumbly mixture. If you have a processor you can put all ingredients in and pulse to incorporate, making sure to not over mix. Press the mixture into the prepared pan. You may need to dip your fingers into a little flour or powdered sugar to keep the dough from sticking to your fingers. Bake for 20 minutes.

    Meanwhile, to make the filling, mix the eggs, granulated sugar, flour, and lemon juice and zest. Pour this over the baked crust and bake for 25 minutes longer. Sprinkle with powdered sugar when cooled.


    Friday, August 20, 2010

    Trifle and my BFF's


    Vicke, Ceci, Cindy, Robin, Patty


    These are some my best friends from the 7th grade and I am so blessed to still have them in my life. We got together for a couple of days here at our house because Patty came down for a family wedding. Patty, who is from Austin Texas came the furthest, Cindy and her husband Donavon came from Santa Barbara, Robin came from Yorba Linda and Vickie lives here at the beach just 5 minutes from me. When we get together times stands still. There is a sisterhood that comes with life long friends and a special bond that only comes from knowing someone when you were young (other than your sister, she has to love you... right Teri? My sister is probably shaking her head right about now )


         I made carnitas for dinner and a trifle for dessert, and was asked to post the trifle, so here it is. It's SUPER easy! (Thank you Patty for helping me put this together)


    Ingredients

    Lg. flat of strawberries (I get the ones from Costco)
    Lg. container blueberries (again, Costco)
    Lg. container raspberries (I got mine at Trader Joes, but Costco had some as well)
    Birds custard pudding or 1 Lg. Instant vanilla pudding mix (this is the easiest and just as tasty)
    1 qt. heavy whipping cream
    1 box angle food cake
    Splash brandy (or splashes, depending on how much alcohol you want to taste)
    Mint leaves for garnish

    Directions
    Bake cake according to directions. Cut up all fruit and set aside. Make pudding and whip cream, set aside.
    Start by putting a little pudding at the bottom of trifle dish. Tear up the cake in pieces and layer on top of pudding. Sprinkle brandy over cake. Layer the fruit on top of cake making sure it is against the sides (so you can see the layers when it's done). Put the whipped cream on top. Start the process all over again, layering each element. End with the whipped cream on top and layer the fruit on top of that for a nice presentation.

    This is best when made the day before so your flavors can marry.